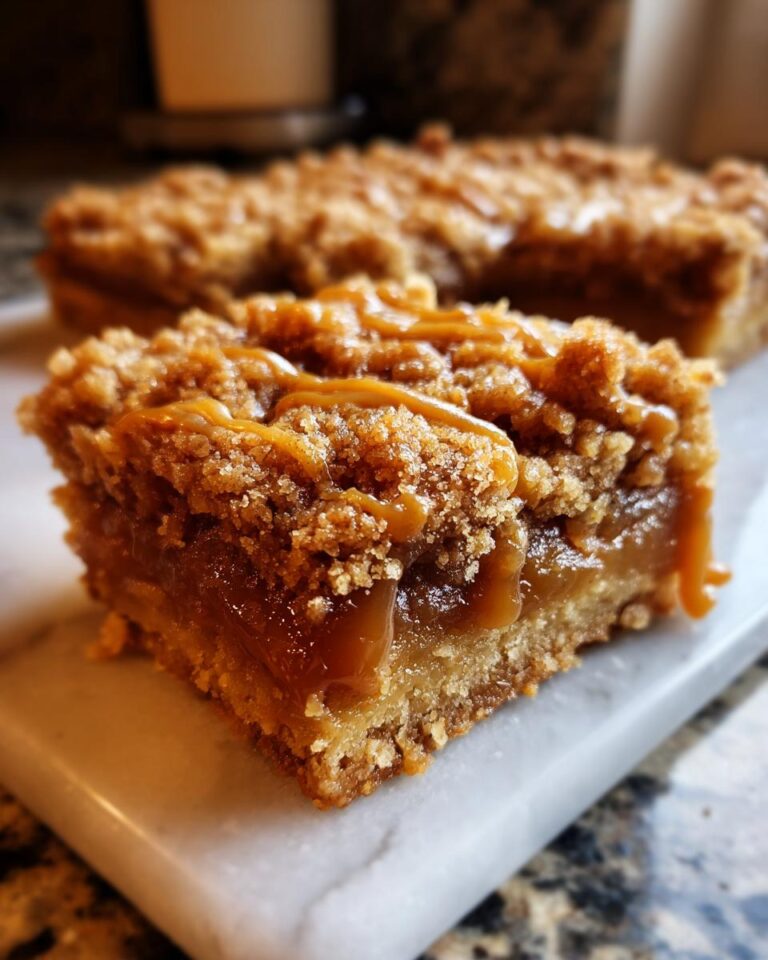
Oh, fall. It just smells like cinnamon, crisp air, and cozy kitchens, doesn’t it? And what better way to capture that feeling than with a batch of these Irresistible Salted Caramel Apple Bars for Fall? Seriously, these bars are like a warm hug on a chilly afternoon. They’ve got that perfect sweet and salty caramel hugging tender apples, all nestled in a buttery, crumbly base. I’ve made a *lot* of fall desserts over the years, and trust me, these bars are a guaranteed hit at any gathering. They’re just so darn good, and they smell amazing while they’re baking!
Why You’ll Love These Irresistible Salted Caramel Apple Bars for Fall
These bars are an absolute dream for anyone who loves fall flavors! They’re ridiculously easy to whip up, making them perfect for busy bakers.
- Quick and Easy Preparation: Seriously, you can have these in the oven in no time!
- Perfect Fall Flavor Combination: That sweet, salty caramel with tart apples? Pure magic.
- Crowd-Pleasing Dessert: Everyone goes nuts for these – they disappear fast!
- Versatile for Any Occasion: From Thanksgiving to a simple Tuesday treat, they fit right in.
Gathering Your Ingredients for Irresistible Salted Caramel Apple Bars for Fall
Okay, let’s get our ducks in a row so we can bake these beauties! Having everything prepped and ready makes the whole process so much smoother. You’ll want to have all these goodies on hand before you even think about preheating that oven. Trust me, it makes all the difference!
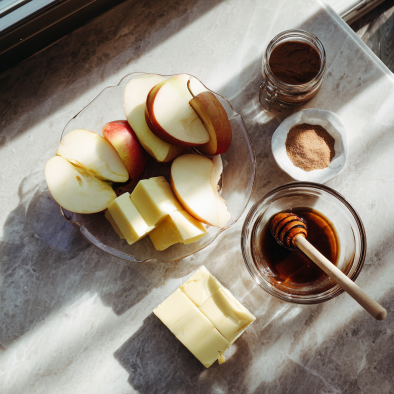
For the Crust and Crumble Topping
All-purpose flour: 1 cup
Light brown sugar, packed: 1/2 cup
Rolled oats: 1/2 cup
Baking soda: 1/2 teaspoon
Salt: 1/4 teaspoon
Unsalted butter, melted: 1/2 cup (that’s one stick!)
For the Apple Filling
Apples, thinly sliced and peeled: 3 cups (about 2-3 medium apples; Honeycrisp or Gala work beautifully here!)
Granulated sugar: 1/4 cup
All-purpose flour: 1 tablespoon (this helps thicken up those yummy apple juices!)
Ground cinnamon: 1 teaspoon
Ground nutmeg: 1/4 teaspoon
For the Salted Caramel Topping
Unsalted butter: 1/4 cup (half a stick)
Light brown sugar, packed: 1 cup
Heavy cream: 1/4 cup
Vanilla extract: 1 teaspoon
Sea salt: 1/2 teaspoon, or a little more if you love that salty kick!
Step-by-Step Guide to Making Salted Caramel Apple Pie Bars
Alright, let’s get down to business and bake these beauties! It’s really not complicated at all, and honestly, the smell alone is worth it. Just follow these steps and you’ll have amazing bars in no time.
Preparing the Crust and Baking
First things first, let’s get that oven hot! Preheat it to 375°F (190°C). Then, grab an 8×8 inch baking pan and line it with parchment paper. Make sure you leave a little extra paper hanging over the sides – this is your “handle” to lift the bars out later, super handy!
In a medium bowl, whisk together the flour, 1/2 cup of that packed brown sugar, the rolled oats, baking soda, and the 1/4 teaspoon of salt. Now, pour in the melted butter and stir it all up until it looks like coarse crumbs. This is going to form our delicious base and topping. Take about two-thirds of this crumbly mixture and press it down nice and even into the bottom of your prepared pan. Pop that into the oven for about 10 to 12 minutes, just until it’s lightly golden. We’re par-baking it, which stops it from getting soggy!
Assembling the Apple Filling
While the crust is doing its thing, let’s get those apples ready. Make sure they’re thinly sliced and peeled. In a big bowl, toss those apple slices with the granulated sugar, that 1 tablespoon of flour, the cinnamon, and the nutmeg. Give it a good toss so every single slice is coated in those warm spices. Once the crust is out of the oven, spread this apple mixture evenly right over the top. It might look like a lot of apples, but they cook down!
Crafting the Salted Caramel Sauce
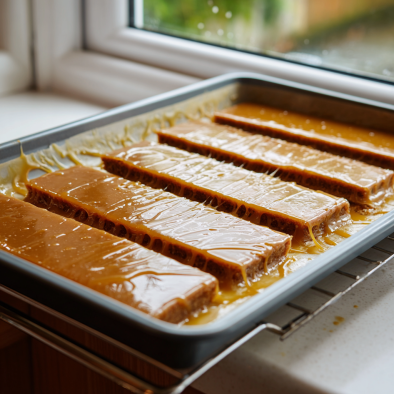
Now for the star of the show – the caramel! In a small saucepan, melt the 1/4 cup of butter over medium heat. Once it’s melted, stir in the 1 cup of packed brown sugar and the heavy cream. Bring this mixture to a gentle simmer and let it bubble away for about 2 to 3 minutes, stirring constantly. You’ll see it start to thicken up. Take it off the heat and stir in the vanilla extract and that all-important sea salt. Give it a good mix!
Final Assembly and Baking
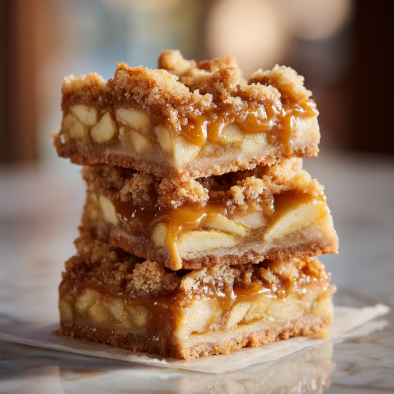
Time to bring it all together! Drizzle that luscious salted caramel sauce all over the apples. Try to get it as even as you can. Then, take that last third of your crumb mixture and sprinkle it all over the caramel. This is our crumble topping! Pop the whole pan back into the oven and bake for another 30 to 35 minutes. You’re looking for the topping to be golden brown and for the apples to be tender when you poke them with a fork. The most important part now? Let these bars cool completely in the pan. I know, it’s torture waiting, but trust me, if you try to cut them when they’re warm, they’ll just fall apart. Once they’re totally cool, use those parchment paper overhangs to lift the whole slab out. Then, just cut them into bars!
Tips for Perfect Caramel Apple Bars
You want to make sure these bars turn out just right, so here are a few little tricks I’ve picked up along the way. A few small things can make a big difference!
Choosing the Right Apples
For the best results, go for apples that hold their shape and have a nice tart-sweet balance. Honeycrisp, Gala, Fuji, or even a Granny Smith (if you like a bit more tang) are fantastic choices. Avoid apples that turn mushy when baked, like Red Delicious.
Achieving the Perfect Caramel Consistency
When you’re simmering the caramel, don’t rush it! Letting it bubble for those 2-3 minutes is key to it thickening up just enough to coat the apples beautifully without being too runny. If it seems a *little* thin, just simmer for another 30 seconds, but watch it carefully so it doesn’t burn!
Ensuring Even Baking
Ovens can be funny little things, right? If you notice your bars browning more on one side than the other, just give the pan a half-turn about halfway through the final baking time. This really helps everything cook evenly.
The Importance of Complete Cooling
I know, I know, the smell is intoxicating and you want to dive right in! But seriously, letting these bars cool *completely* is the secret to getting those clean, beautiful slices. If you cut them too soon, they’ll crumble apart, and nobody wants that. Patience, my friends, patience!
FAQs
Got questions? I’ve got answers! Baking should be fun, not frustrating, so let’s clear up any little doubts you might have about these yummy bars.
Can I use different types of apples in these bars?
Absolutely! While I love Honeycrisp or Gala for their sweet-tart balance and how they hold their shape, feel free to experiment. Granny Smith will give you a nice tang, and Fuji or Pink Lady are also great choices. Just make sure they’re not the super soft, mushy kind!
How should I store leftover apple pie bars?
If, by some miracle, you have leftovers, just keep them in an airtight container at room temperature for up to 2 days. If it’s really warm out, or you want them to last a bit longer, pop them in the fridge. They’ll be good for about 4-5 days that way.
Can these caramel apple bars be made ahead of time?
Yes, you totally can! Since they need to cool completely anyway, you can bake them a day in advance. Just store them at room temperature in an airtight container. They’re actually even better the next day once the flavors have really melded together!
What is the best way to reheat these bars?
If you prefer them warm, I suggest popping a bar in the microwave for about 10-15 seconds, just until slightly warmed through. You can also warm them gently in a low oven (around 300°F or 150°C) for a few minutes. They’re delicious either way!
Are these pie bar recipes suitable for Thanksgiving desserts?
Oh, 100%! These are practically *made* for Thanksgiving! They’re a fantastic alternative or addition to traditional pies, and they’re so much easier to serve to a crowd. Everyone loves a good pie bar recipe, especially when they taste this good!
Print
Irresistible Salted Caramel Apple Bars: 3 Perfect Fall Hits
- Total Time: 1 hour 5 minutes
- Yield: 16 bars
- Diet: Vegetarian
Description
Deliciously sweet and salty bars featuring a crisp apple filling and a rich caramel topping, perfect for autumn gatherings.
Ingredients
- 1 cup all-purpose flour
- 1/2 cup packed light brown sugar
- 1/2 cup rolled oats
- 1/2 teaspoon baking soda
- 1/4 teaspoon salt
- 1/2 cup (1 stick) unsalted butter, melted
- 3 cups thinly sliced peeled apples (about 2–3 medium)
- 1/4 cup granulated sugar
- 1 tablespoon all-purpose flour
- 1 teaspoon ground cinnamon
- 1/4 teaspoon ground nutmeg
- 1/4 cup (1/2 stick) unsalted butter
- 1 cup packed light brown sugar
- 1/4 cup heavy cream
- 1 teaspoon vanilla extract
- 1/2 teaspoon sea salt, or to taste
Instructions
- Preheat oven to 375°F (190°C). Line an 8×8 inch baking pan with parchment paper, leaving an overhang on the sides.
- In a medium bowl, combine flour, 1/2 cup brown sugar, oats, baking soda, and 1/4 teaspoon salt. Stir in melted butter until crumbs form.
- Press 2/3 of the crumb mixture evenly into the bottom of the prepared pan.
- Bake the crust for 10-12 minutes, until lightly golden. Remove from oven.
- In a large bowl, toss sliced apples with granulated sugar, 1 tablespoon flour, cinnamon, and nutmeg.
- Spread the apple mixture evenly over the baked crust.
- In a small saucepan, melt 1/4 cup butter over medium heat. Stir in 1 cup brown sugar and heavy cream. Bring to a simmer and cook for 2-3 minutes, stirring constantly, until thickened.
- Remove from heat and stir in vanilla extract and sea salt.
- Drizzle the caramel sauce evenly over the apples.
- Sprinkle the remaining 1/3 of the crumb mixture over the caramel.
- Bake for 30-35 minutes, or until the topping is golden brown and the apples are tender.
- Let cool completely in the pan before lifting out by the parchment paper. Cut into bars.
Notes
- For a stronger salted caramel flavor, sprinkle a little extra sea salt on top before serving.
- Ensure apples are sliced thinly for even cooking.
- Allow bars to cool completely before cutting for clean slices.
- Prep Time: 20 minutes
- Cook Time: 45 minutes
- Category: Dessert
- Method: Baking
- Cuisine: American
Nutrition
- Serving Size: 1 bar
- Calories: 350
- Sugar: 30g
- Sodium: 150mg
- Fat: 18g
- Saturated Fat: 11g
- Unsaturated Fat: 7g
- Trans Fat: 0g
- Carbohydrates: 45g
- Fiber: 2g
- Protein: 3g
- Cholesterol: 45mg
Ingredient Notes and Substitutions for Caramel Apple Pie Bars
Sometimes you’re in the kitchen and realize you’re missing something, or maybe you just want to tweak things a bit! Don’t worry, these bars are pretty forgiving.
Flour Options for the Crust
The all-purpose flour is pretty standard, but if you need to go gluten-free, a good 1-to-1 gluten-free baking blend usually works just fine. Just make sure it contains xanthan gum. I haven’t personally tested it, but many bakers have success with it in recipes like this!
Sweetener Adjustments
I love the deep flavor of packed light brown sugar here, but if you’re in a pinch, you could try dark brown sugar for a richer molasses note. You can also slightly adjust the sugar in the apple filling if your apples are super sweet or extra tart, just taste as you go!
Dairy-Free Caramel Alternatives
Making these dairy-free is totally doable! You can swap the butter for a good quality vegan butter stick, and use full-fat canned coconut milk or a dairy-free heavy cream alternative instead of the dairy cream. It might change the flavor just a *tiny* bit, but it’ll still be delicious!
Spice Variations
Cinnamon and nutmeg are classic for a reason, but feel free to play around! A pinch of ground ginger or allspice in the apple filling can add a lovely warmth. You could even add a tiny bit of cardamom if you’re feeling adventurous!
Serving Suggestions for Your Apple Pie Bars
These bars are pretty amazing just as they are, but here are a few ideas to make them even more special! They’re fantastic served either warm or at room temperature, depending on what you’re in the mood for.
Warm or Cold Serving
Honestly, I love them both ways! A slightly warm bar is heavenly right out of the oven (after cooling, of course!). But they’re also perfectly delicious at room temperature, making them super portable.
Accompaniments
For an extra treat, try serving a bar with a scoop of vanilla bean ice cream – the warm caramel and cold ice cream are a match made in heaven! A dollop of freshly whipped cream is also divine. Or, if you want to keep it simple but elegant, a light dusting of powdered sugar right before serving looks so pretty!
Perfect for Fall Gatherings
These bars are just tailor-made for all those fall get-togethers. They travel well, they’re easy to serve, and they always get rave reviews. Think potlucks, family dinners, or just a cozy night in with a cup of cider!
Estimated Nutritional Information for Salted Caramel Apple Bars
Just a heads-up, these numbers are estimates! The exact nutritional values can change a bit depending on the specific brands of ingredients you use and how you slice your bars. But this should give you a good idea!
Estimated Values Per Bar
- Calories: 350
- Fat: 18g
- Protein: 3g
- Carbohydrates: 45g
- Sugar: 30g
- Sodium: 150mg
I just love hearing from you all! Did you make these amazing Irresistible Salted Caramel Apple Bars for Fall? Did they disappear as fast at your house as they do at mine? I’d be thrilled if you’d share your thoughts, any little tweaks you made, or even just tell me how much you loved them! You can also find more delicious recipes and inspiration on Pinterest.
Leave a Comment Below
Drop a comment and let me know what you thought of the recipe. Your feedback means the world to me!
Rate This Recipe
If you loved these bars, please consider giving them a star rating! It really helps other bakers find the recipe.
Got a picture of your beautiful bars? I’d be absolutely delighted to see them! Feel free to share them on social media and tag me – I can’t wait to see your delicious creations!