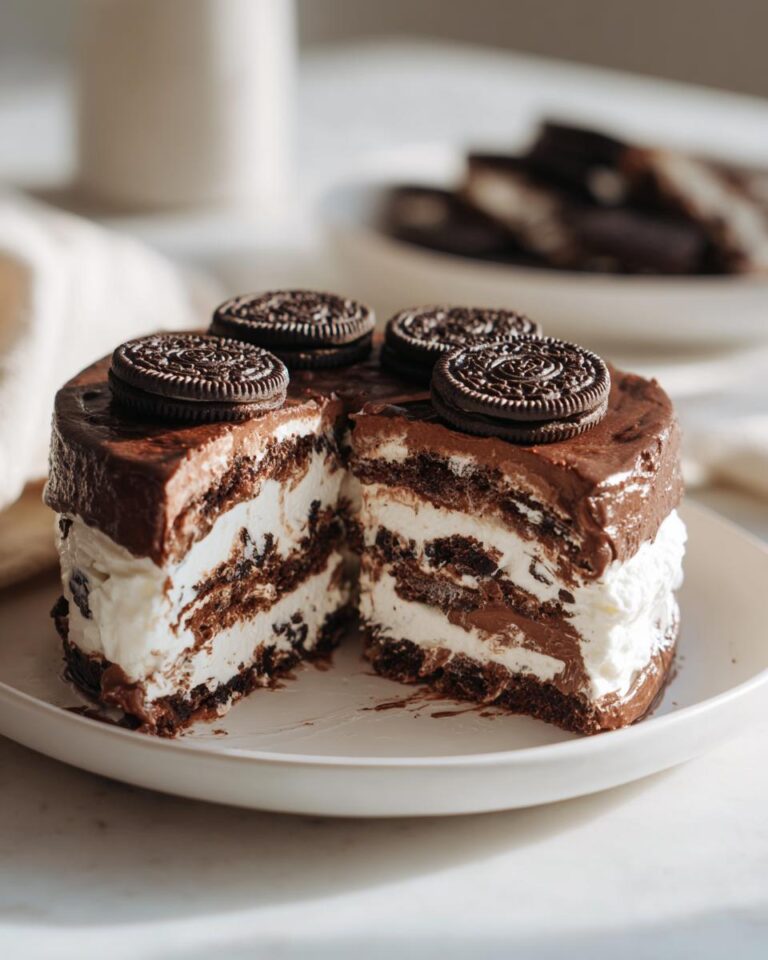
Okay, friends, let me tell you about the easiest, most decadent dessert you’ll ever make – my Creamy Chocolate Icebox Cake! Seriously, it’s a game-changer. I’ve been making this for years, and it’s always a crowd-pleaser. The best part? No oven required! That’s right, it’s a total no-bake wonder, perfect for those hot summer days (or anytime you just don’t feel like heating up the kitchen!).
I’ve tweaked and perfected this recipe over time, and trust me, it’s foolproof. You’re going to love the layers of chocolatey goodness, and it’s so simple to put together. It’s a perfect make-ahead treat for parties, potlucks, or just a little something special for yourself. So, grab your ingredients, and let’s get started on this Creamy Chocolate Icebox Cake (No-Bake Favorite) – your taste buds will thank you!
Ingredients for the Delightful Creamy Chocolate Icebox Cake (No-Bake Favorite)
Alright, let’s get down to the good stuff! You won’t believe how few ingredients you need for this dream of a dessert. Seriously, it’s a piece of cake (pun intended!). Make sure you grab these, because you don’t want to be halfway through and realize you’re missing something. Trust me, I’ve been there!
Ingredient List
- Chocolate sandwich cookies: 1 (14.4 ounce) package – Yep, those classic ones!
- Heavy cream: 2 cups – Don’t skimp on the good stuff!
- Powdered sugar: 1/4 cup – Also known as confectioners’ sugar.
- Unsweetened cocoa powder: 1/4 cup – Gives that rich chocolate flavor.
- Vanilla extract: 1 teaspoon – Pure vanilla, please!
- Chocolate shavings or sprinkles (optional): for garnish – Because, why not?
Step-by-Step Instructions: How to Make a Creamy Chocolate Icebox Cake (No-Bake Favorite)
Okay, now for the fun part! This Creamy Chocolate Icebox Cake is super easy to put together, I promise. Just follow these simple steps, and you’ll be enjoying a slice of heaven in no time. You can totally do this, even if you’re not a pro baker!
Preparing the Chocolate Cream
First up, let’s make that luscious chocolate cream. Grab your mixing bowl (a stand mixer works great, but a hand mixer is fine too!), and pour in your heavy cream. Whip it until soft peaks form. Next, slowly add in the powdered sugar and cocoa powder. Don’t dump it all in at once, or you’ll have a cocoa powder cloud! Keep whipping until you get stiff peaks. You’ll know it’s ready when the cream holds its shape and doesn’t droop. Finally, stir in that vanilla extract. Yum!
Assembling the Chocolate Icebox Cake
Okay, time to build this beauty! Grab a loaf pan and line it with plastic wrap, leaving some overhang on the sides. This will help you get the cake out later. Now, start with a layer of those chocolate sandwich cookies at the bottom of the pan. Next, spread a generous layer of that amazing chocolate cream over the cookies, making sure to cover them completely. Repeat those layers – cookies, then cream – until you’ve used up all your ingredients, ending with a layer of cream on top. Make sure every cookie is covered; that’s the key!
Chilling and Serving Your No Bake Dessert
Now, cover the top with the plastic wrap and pop it in the fridge. You’ll want to chill it for at least 4 hours, but honestly, overnight is even better. The longer it chills, the more the cookies soften and meld with the cream, making the whole thing even more amazing! When you’re ready to serve, flip the cake over onto a plate, remove the plastic wrap, and garnish with chocolate shavings or sprinkles. Slice and enjoy! Trust me, it’s worth the wait!
Why You’ll Love This Creamy Chocolate Icebox Cake (No-Bake Favorite)
Okay, let me tell you why I’m obsessed with this cake (besides the fact that it’s ridiculously easy!). Seriously, it’s got everything going for it! You’re going to be so happy you tried this one. Here’s why it’s a winner:
- Easy Peasy! Seriously, no oven needed, and it comes together in minutes.
- Flavor Explosion! That perfect combo of chocolate cookies and creamy, dreamy chocolate. Wow!
- Make-Ahead Magic! Perfect for parties because you can make it the day before.
- Crowd-Pleaser! Everyone loves it, from kids to adults. Guaranteed!
- Versatile! Great for any occasion, from birthdays to a simple weeknight treat.
Seriously, what’s not to love?
Ingredient Notes and Substitutions for Your Chocolate Icebox Cake
Okay, let’s talk about a few ingredient tweaks. I always say, baking (or, in this case, no-baking!) is all about making it your own. Don’t be afraid to experiment! So, here are some ideas for substitutions and variations that I’ve tried and loved. You’ll want to take notes, trust me!
Cookie Variations
While I love those classic chocolate sandwich cookies (they’re just perfect!), you can absolutely switch things up. Try different flavors! Vanilla cookies, chocolate wafers, even those fancy sandwich cookies with the peanut butter filling would be *amazing*. Just make sure they’re sturdy enough to hold up to the cream!
Cocoa Powder Options
The cocoa powder you use makes a difference in the intensity of the chocolate flavor. I usually use unsweetened cocoa powder, but if you want a richer, deeper chocolate taste, try using Dutch-processed cocoa powder. It’s less acidic and has a really lovely, complex flavor. You’ll love it!
Cream Alternatives and Dairy-Free Options
Need a dairy-free option? No problem! You can totally use full-fat coconut cream instead of heavy cream. Just make sure to chill the coconut cream overnight so you can whip it properly. You can also try using a plant-based whipped cream alternative. Just be sure to check the instructions and make sure it whips up stiff enough for our cake. Sometimes, you need to add a little extra powdered sugar to help it along. You’ve got this!
Tips for Success: Perfecting Your No Bake Desserts
Okay, friends, wanna know my secrets to a perfect Creamy Chocolate Icebox Cake every single time? Here are a few things I’ve learned over the years! First, make sure those cookies are *completely* covered in the chocolate cream. Don’t be shy! Second, use the best quality ingredients you can find. It really does make a difference! And finally, don’t rush the chilling time. Patience is a virtue, and it’s totally worth the wait, trust me. You’ll thank me later!
Frequently Asked Questions About Creamy Chocolate Icebox Cake
Okay, so I get asked about this cake *all* the time! It’s so good, everyone wants to know all the ins and outs. So, I figured, let’s address some of the most common questions right here. Hopefully, this helps you on your Creamy Chocolate Icebox Cake journey! Seriously, it’s a journey worth taking!
How long can I store the Chocolate Icebox Cake?
You can store the cake in the fridge for up to 3-4 days, covered tightly with plastic wrap. It’s best eaten within that time, but it’s usually gone way before then, haha!
Absolutely! Feel free to get creative! I’ve mentioned it before, but seriously, the cookie possibilities are endless. Just make sure the cookies aren’t *too* delicate. You want something that will hold up to the cream.
How can I prevent the cake from getting soggy?
The key is to make sure the cookies are completely covered in the cream, and chilling it for the recommended time. Don’t skip the chill time! Also, try not to use cookies that are *too* thin, as they might absorb too much moisture. You can also add a thin layer of whipped cream to the bottom of the pan before adding the cookies, for an extra barrier.
Can I make this No Bake Dessert ahead of time?
Yes! That’s the beauty of this No Bake Dessert! It’s a perfect make-ahead treat. You can make it a day or two in advance. Just be sure to store it properly in the fridge.
Can I add other flavors to the Creamy Chocolate Icebox Cake?
Yes, go crazy! You can add a layer of peanut butter, a drizzle of caramel, or even some chopped nuts between the layers. You could also add different extracts to the cream, like peppermint or almond, for a little something extra. Get creative!
Estimated Nutritional Information of Creamy Chocolate Icebox Cake (No-Bake Favorite)
Okay, so I’m not a nutritionist, and this is just an estimate, mind you! But, for a single slice, you’re looking at roughly 350 calories, 25g of fat, and about 30g of carbs. There’s also some protein and sugar in there. But hey, it’s worth it, right?!
Serving Suggestions for Your Chocolate Icebox Cake
Okay, now for the best part: serving! This Chocolate Icebox Cake is amazing all on its own, but sometimes you want to take it to the next level. I love serving it with a hot cup of coffee – the chocolate and coffee combo is just *chef’s kiss*! Or maybe a scoop of vanilla ice cream? Yes, please! Really, anything goes, so have fun with it!
(Optional) Storage & Reheating Instructions for Make Ahead Desserts
So, you’ve got leftovers? Lucky you! Store your Chocolate Icebox Cake in the fridge, covered tightly, for up to 3-4 days. Honestly, it’s usually gone before then! Reheating? Not really needed! It’s best served cold. If it gets a little too firm, let it sit out at room temperature for a few minutes before slicing. Enjoy every bite!
Okay, now it’s YOUR turn! I can’t wait to see your versions of this cake! Make it, snap a pic, and share it with me! Let me know what you thought! Happy baking… or, well, no-baking!
Print
Delectable Creamy Chocolate Icebox Cake: 1 Easy Recipe
- Total Time: 4 hours 20 minutes
- Yield: 8 servings
- Diet: Vegetarian
Description
A simple no-bake dessert featuring layers of cookies and creamy chocolate.
Ingredients
- Chocolate sandwich cookies: 1 (14.4 ounce) package
- Heavy cream: 2 cups
- Powdered sugar: 1/4 cup
- Unsweetened cocoa powder: 1/4 cup
- Vanilla extract: 1 teaspoon
- Chocolate shavings or sprinkles (optional): for garnish
Instructions
- In a bowl, whip heavy cream until soft peaks form.
- Gradually add powdered sugar and cocoa powder, whipping until stiff peaks form.
- Stir in vanilla extract.
- Line a loaf pan with plastic wrap.
- Arrange a layer of cookies in the pan.
- Spread a layer of the chocolate cream over the cookies.
- Repeat layers, ending with a layer of cream.
- Cover and refrigerate for at least 4 hours, or preferably overnight.
- Invert the cake onto a serving plate.
- Garnish with chocolate shavings or sprinkles.
- Slice and serve.
Notes
- You can use different types of cookies.
- Add a pinch of salt to the cream for extra flavor.
- For a richer flavor, use dark chocolate cocoa powder.
- Make sure the cookies are fully covered in cream.
- Prep Time: 20 minutes
- Cook Time: 0 minutes
- Category: Dessert
- Method: No-bake
- Cuisine: American
Nutrition
- Serving Size: 1 slice
- Calories: 350
- Sugar: 25g
- Sodium: 150mg
- Fat: 25g
- Saturated Fat: 15g
- Unsaturated Fat: 8g
- Trans Fat: 0g
- Carbohydrates: 30g
- Fiber: 2g
- Protein: 4g
- Cholesterol: 75mg