Oh, Halloween food! It’s honestly one of my favorite things to cook up. There’s just something so fun about turning a regular meal into something a little spooky and totally exciting for the kids. My own little goblins get so thrilled when their dinner looks like it came straight out of a haunted house! That’s why I absolutely adore this Halloween Grilled Cheese Halloween Meal. It’s the perfect blend of spooky, simple, and super yummy. Forget spending hours in the kitchen; this recipe is a lifesaver on busy fall evenings, and trust me, everyone will be begging for seconds!

Why You’ll Love This Halloween Grilled Cheese
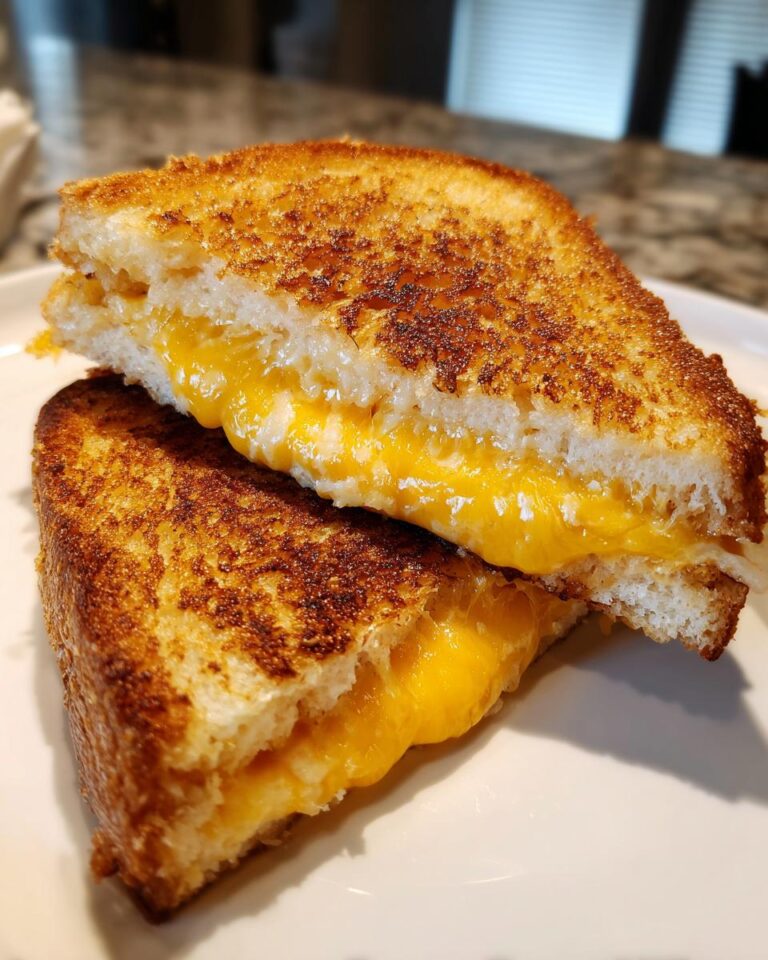
This isn’t just any grilled cheese; it’s a Halloween party starter! Here’s why it’s a total winner for your next spooky get-together:
- Super Speedy: With just 13 minutes total time, it’s perfect for a quick and fun Halloween Meal.
- Seriously Simple: You only need a handful of basic ingredients and a few easy steps.
- Kid-Approved Fun: It’s a fantastic, kid-friendly option that turns a classic into a festive treat.
- Totally Customizable: Get creative with shapes and decorations to make each sandwich unique!
It really stands out as the perfect Halloween Meal because it’s delicious, engaging, and so easy to whip up. For more fun ideas, check out our Pinterest page!
Gathering Your Halloween Grilled Cheese Ingredients
Alright, let’s get our spooky supplies together for this fantastic Halloween Grilled Cheese! It couldn’t be simpler. You’ll need:
- 2 slices of bread: I usually go with good old white bread or whole wheat for this, something that grills up nice and golden.
- 2 slices of cheese: Cheddar or American cheese are my top picks because they melt like a dream. Make sure they’re not too thick, or they might not melt all the way through before your bread burns.
- 1 tablespoon butter: Unsalted is usually best for cooking, but salted works too if that’s what you have on hand!
- Optional: Black olives for decoration: These are our secret weapons for making it look extra Halloween-y! We’ll talk more about what to do with them in a bit.
That’s it! See? Super easy ingredients that probably already live in your kitchen.

Ingredient Notes and Substitutions for Your Halloween Meal
Don’t have exactly what I listed? No worries! For the bread, a sturdy white or whole wheat is great because it holds up well to grilling. Sourdough can also be yummy, but it might give it a tangier flavor. When it comes to cheese, feel free to mix it up! A slice of provolone or Monterey Jack alongside your cheddar is delicious. For decoration, if olives aren’t your jam, you could use small pieces of bell pepper to make little shapes, or even some edible googly eyes if you can find them! The goal is just to have a little fun with it for your Halloween Meal.
Step-by-Step Guide to Your Halloween Grilled Cheese
Ready to make some magic happen? This is where your Halloween Grilled Cheese really comes to life! It’s so straightforward, you’ll be done in a flash.
- First things first, grab your two slices of bread. You want to butter one side of each slice. This is what gives us that gorgeous golden-brown crust we all love.
- Now, take one slice of bread and place it butter-side down into your non-stick skillet. Get that skillet over medium heat – you don’t want it too high, or your bread will burn before the cheese melts!
- Time for the star of the show: the cheese! Lay your two slices of cheese right on top of the bread that’s already in the pan. Try to keep it within the edges of the bread so it doesn’t ooze out *too* much right away.
- Next, carefully place the second slice of bread on top of the cheese, making sure the buttered side is facing UP. This is our top layer.
- Now, let it grill away for about 3 to 4 minutes. You’re looking for that beautiful golden-brown color on the bottom slice. Then, it’s time to flip! Use a spatula to gently flip the whole sandwich over.
- Grill the other side for another 3 to 4 minutes. You’ll know it’s ready when that side is also golden brown and, more importantly, the cheese inside is all melty and gooey. This is the moment of truth for your perfect Halloween Grilled Cheese!
- This is where the fun really begins for our Halloween Meal! If you’re using cookie cutters, now’s the time to do it. You can either cut shapes out *before* you grill (just be gentle!) or carefully cut the sandwich *after* it’s cooked. If you’re decorating with olives, you can add them now. Slice them up to look like little spider legs crawling out from the sides, or use two halves to make spooky eyes peeking out. Get creative!
And voilà! You’ve got yourself a delicious and spooky Halloween masterpiece!

Tips for Perfecting Your Halloween Grilled Cheese
Want to make your Halloween Meal even more spectacular? A few little tricks go a long way! Always keep an eye on that heat – medium is your friend. If it seems to be browning too fast, just turn it down a notch. Don’t be afraid to experiment with your cheese! A mix of cheddar and Monterey Jack is divine, or maybe even a little bit of pepper jack for a tiny kick. And for those decorations, really go wild! Using little bits of bell pepper or even edible markers can make your Halloween Grilled Cheese totally unique and extra festive for the kids.
Creative Ways to Decorate Your Halloween Grilled Cheese
Now for the super fun part – making your Halloween Grilled Cheese look as spooky as it tastes! It’s all about the visual magic for a great Halloween Meal. Using cookie cutters is a fantastic way to get fun shapes like ghosts, bats, or pumpkins before you even start grilling. Just press them gently into the sandwich! If you’re using black olives, slice them thinly and arrange them around the edges like creepy spider legs, or use two halves to make little beady eyes peeking out from the melted cheese. You could also use a small knife to cut tiny shapes from a slice of cheese and stick them on top, or even use safe, edible markers to draw a spooky face once it’s cooked. The possibilities are endless!
Essential Equipment for Your Halloween Grilled Cheese
You really don’t need much to whip up this fun Halloween Grilled Cheese! The most important things are a good non-stick skillet and a trusty spatula for flipping. If you’re feeling fancy and want to make fun shapes, grab some Halloween-themed cookie cutters. That’s pretty much it! Simple tools for a simple, spooky treat.
Frequently Asked Questions About Your Halloween Grilled Cheese Halloween Meal
Got questions about making this awesome Halloween Grilled Cheese? I’ve got answers!
Q: Can I make this Halloween Grilled Cheese ahead of time?
Honestly, grilled cheese is best fresh off the skillet when the cheese is all melty! It doesn’t reheat super well and can get a bit soggy. It’s so quick to make, though, that it’s totally worth doing it right before you serve it.
Q: What other fillings can I add to this Halloween Meal?
Oh, you can totally get creative! For a spooky twist, maybe add a thin slice of ham or turkey. Some folks like to add a little bit of cooked bacon bits inside. Just remember not to overstuff it, or the cheese won’t melt properly for your perfect Halloween Meal.
Q: Is this recipe suitable for picky eaters?
Absolutely! It’s basically a classic grilled cheese, which most picky eaters love. The fun shapes and decorations make it extra appealing, turning a familiar food into something exciting and less intimidating. It’s a total win for a Fun Meal!
Q: How do I make the sandwich extra crispy?
To get that super crispy exterior, make sure your heat is medium, not too high. Also, don’t skimp on the butter – make sure both sides of the bread are nicely coated. Pressing down gently with your spatula while it cooks can also help achieve that perfect crunch!
Storage and Reheating Your Delicious Halloween Meal
If you happen to have any of this spooky Halloween Meal leftover (which is rare!), it’s best to store it in an airtight container in the fridge for up to a day. For reheating, I’d suggest popping it in a dry skillet over low-medium heat for a few minutes per side. This helps bring back some of that crispiness. You can also try a toaster oven, but avoid the microwave if you want to keep it from getting soggy!
Estimated Nutritional Information for Your Halloween Grilled Cheese
Just a heads-up, the nutritional info for this tasty Halloween Grilled Cheese is an estimate! It can totally change depending on the exact bread, cheese, and butter you use. Because we’re all about keeping things simple and fun here, we don’t give exact numbers, but it’s a pretty standard grilled cheese with a few extra calories from the butter and cheese.
Print
Spooky 13-Minute Halloween Grilled Cheese Meal
- Total Time: 13 minutes
- Yield: 1 sandwich
- Diet: Vegetarian
Description
A spooky and delicious grilled cheese sandwich perfect for Halloween.
Ingredients
- 2 slices of bread
- 2 slices of cheese (cheddar or American recommended)
- 1 tablespoon butter
- Optional: Black olives for decoration
Instructions
- Butter one side of each slice of bread.
- Place one slice of bread, butter-side down, in a non-stick skillet over medium heat.
- Layer the cheese on top of the bread in the skillet.
- Place the second slice of bread on top of the cheese, butter-side up.
- Grill for 3-4 minutes per side, until the bread is golden brown and the cheese is melted.
- For a Halloween theme, use cookie cutters to shape the sandwich before grilling, or add olive slices to resemble spider legs or eyes after grilling.
Notes
- Adjust heat to prevent burning.
- Experiment with different cheese combinations.
- Get creative with decorations for extra Halloween fun.
- Prep Time: 5 minutes
- Cook Time: 8 minutes
- Category: Main Course
- Method: Grilling
- Cuisine: American
Nutrition
- Serving Size: 1 sandwich
- Calories: 350
- Sugar: 2g
- Sodium: 700mg
- Fat: 20g
- Saturated Fat: 10g
- Unsaturated Fat: 10g
- Trans Fat: 0.5g
- Carbohydrates: 25g
- Fiber: 1g
- Protein: 15g
- Cholesterol: 50mg


 15")