Okay, friends, let me tell you, I’ve *always* been a bit intimidated by cheesecake. All that fuss about water baths? Forget it! But I’ve been baking for, well, let’s just say a *while* now, and I’ve finally cracked the code to making the most amazing No Water Bath Cheesecake for Beginners. Seriously, this recipe is a game-changer. It’s rich, it’s creamy, and best of all, it’s completely foolproof. You won’t believe how easy it is to whip up a show-stopping dessert that’ll have everyone begging for the recipe! I’ve made this cheesecake countless times for family gatherings, and potlucks, and it always disappears in record time. I’m so excited to share it with you!
Why Choose This No Water Bath Cheesecake for Beginners Recipe?
Listen, baking should be fun, right? That’s why I’m obsessed with this No Water Bath Cheesecake for Beginners. It’s truly a dream come true! Here’s why you’ll love it:
The Stress-Free Baking Experience
No more stressing about complicated techniques! This recipe is designed for those just starting out. You know, the kind of recipe where you don’t need fancy equipment, and the instructions are super clear. Trust me, you can totally do this, and you’ll actually *enjoy* the process!
Delicious Results Every Time
Forget dry, crumbly cheesecakes! This recipe is all about that creamy, melt-in-your-mouth texture and rich flavor. Seriously, you’ll be amazed at how decadent this cheesecake tastes, even without the water bath. It’s pure, unadulterated deliciousness, every single time!
No Water Bath Cheesecake for Beginners: Ingredients You’ll Need
Alright, let’s talk ingredients! For this amazing No Water Bath Cheesecake for Beginners, you’ll need some basics. Nothing too crazy, I promise! We’re talking graham crackers, butter, sugar, cream cheese (the star!), vanilla, and eggs. Easy peasy, right?
Ingredient Breakdown: A Closer Look
Okay, let’s dive into the details! You’ll need graham cracker crumbs, and I always recommend buying the pre-crushed kind – saves a step! You’ll also need some granulated sugar for the crust, and melted unsalted butter. Make sure your butter is *melted* – not just softened! Measure everything carefully, because baking is a science, you know? The star of the show? Cream cheese! And we’ll get into that in a second.
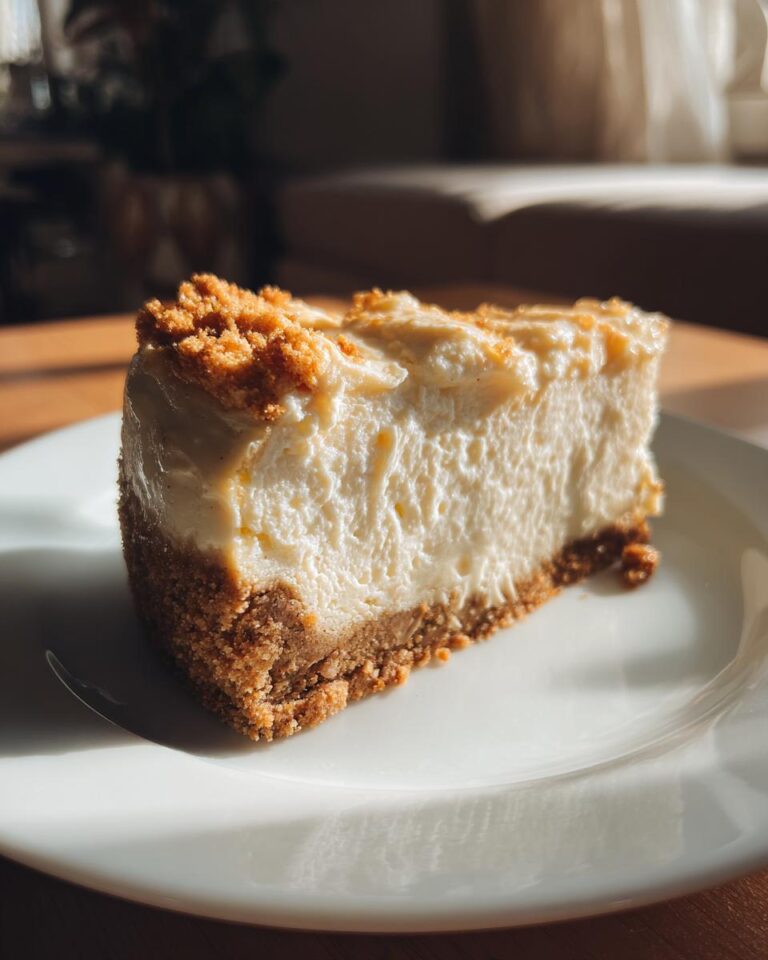
About the Graham Cracker Crust
The crust is the foundation, right? So, make sure your graham cracker crumbs are nice and fine. You don’t want big chunks! And when you mix the crumbs with the sugar and melted butter, make sure it’s all evenly moistened. This will help the crust hold together beautifully and give your No Water Bath Cheesecake for Beginners the perfect texture.
Cream Cheese: The Heart of the Cheesecake
Now, about that cream cheese. *Full-fat* cream cheese is a MUST for that rich, creamy flavor and texture we’re after. Don’t even think about using low-fat! And here’s the most important tip: your cream cheese *must* be softened. I usually take it out of the fridge a couple of hours before I start, but if you’re in a rush, you can soften it in the microwave. Just be careful not to melt it!
Step-by-Step Instructions: Making Your No Water Bath Cheesecake for Beginners
Okay, now for the fun part: actually making this amazing No Water Bath Cheesecake for Beginners! Don’t worry, it’s super easy, and I’ll walk you through every single step. Just follow along, and you’ll be enjoying a slice of heaven in no time. Ready? Let’s go!
Preparing the Crust: The Foundation of Your Cheesecake
First things first, let’s get that crust ready! You’re going to take your graham cracker crumbs (remember those pre-crushed ones?!) and mix them with the sugar and melted butter in a bowl. Make sure everything is well combined; you want it to look like wet sand. Next, grab a 9-inch springform pan – this is key for easy removal! Press the mixture firmly into the bottom of the pan. I like to use the bottom of a measuring cup or a flat-bottomed glass to really pack it in. This gives it a solid foundation.
Crafting the Creamy Filling
Alright, time for the *magic*! In a large bowl – or the bowl of your stand mixer, if you’re fancy – beat your softened cream cheese and sugar together until it’s smooth and creamy. This is super important! You want to make sure there are no lumps of cream cheese. Next, add in that splash of vanilla extract. It adds the perfect touch! Then, add the eggs one at a time, mixing until just combined after each addition. Be careful not to overmix at this stage; you don’t want to incorporate too much air, which can lead to cracks.
Baking to Perfection
Now, pour that beautiful filling over the prepared crust. Smooth out the top with a spatula – it doesn’t have to be perfect! Preheat your oven to 350°F (175°C). Carefully place the cheesecake in the preheated oven and bake for about 50-60 minutes. The edges should be set, but the center should still have a slight jiggle. Don’t worry if it looks a little wobbly; it’ll set up as it cools! It’s better to slightly underbake than overbake at this point.

Cooling and Chilling: The Key to a Perfect No Water Bath Cheesecake
This is a super important step, so listen up! Let the cheesecake cool completely at room temperature. Then, and this is crucial, refrigerate it for at least 4 hours, or preferably *overnight*. This chilling time allows the cheesecake to fully set and develop its delicious flavor and texture. Trust me, the wait is worth it! And that’s it! You’ve successfully made a No Water Bath Cheesecake for Beginners. Woohoo!
Tips for Success: Achieving the Perfect No Water Bath Cheesecake
Okay, so you’ve got your ingredients, you’ve followed the steps, and now you want to make sure your No Water Bath Cheesecake is absolutely perfect, right? Don’t worry, I’ve got you! A few simple tips can make all the difference between good and *OMG-this-is-amazing*.
Preventing Cracks in Your Cheesecake
Cracks can be the bane of a cheesecake baker’s existence! But don’t you worry, my friend, because we’re going to avoid them! The key is to not overbake your cheesecake. Also, let it cool *slowly*. That means letting it cool at room temperature before you pop it in the fridge. This slow cooling helps prevent those pesky cracks from forming.
Cream Cheese Temperature Matters
I can’t stress this enough: *softened* cream cheese is your best friend! If your cream cheese isn’t soft enough, you’ll end up with lumps in your batter, and no one wants that! It won’t mix properly and you’ll have to work harder to get there. Room temperature is key. So, let that cream cheese hang out on the counter for a bit before you start. Trust me, it makes a world of difference!
No Water Bath Cheesecake for Beginners: Variations to Explore
Once you’ve mastered the basics of this No Water Bath Cheesecake for Beginners, you’re gonna want to experiment, trust me! This recipe is a fantastic base for all sorts of delicious variations. So, get ready to get creative and put your own spin on things. Seriously, the possibilities are endless!
Flavor Infusions: Elevate Your Cheesecake
Want to take your cheesecake to the next level? You’ve got options! You can add some lemon zest or a teaspoon of vanilla extract to the batter for a bright, citrusy flavor. Chocolate lovers, you can add melted chocolate, chocolate extract, or cocoa powder. Or, how about a swirl of your favorite jam? Trust me, it’s a game-changer! Go wild, have fun, and find your favorite combination!
Topping Ideas: Finishing Touches
And now for the best part: the toppings! Fresh fruit is always a winner. Berries, sliced peaches, or even a simple compote will make your No Water Bath Cheesecake look gorgeous. Chocolate shavings are always a good idea, and a simple glaze made with powdered sugar and a little milk or cream adds a touch of sweetness. Don’t be afraid to get creative and try different things – you never know what you’ll discover!

Serving Suggestions for Your Delicious No Water Bath Cheesecake
Okay, so you’ve baked this amazing No Water Bath Cheesecake, and now it’s time to show it off! I love serving it on a pretty cake stand – it just makes it feel extra special. You can slice it nice and neat on a cutting board, or go for rustic slices. Don’t forget a dollop of whipped cream or a drizzle of your favorite topping! It’s all about making it look as good as it tastes!
Storage and Reheating Instructions
So, you’ve got leftovers? Amazing! This No Water Bath Cheesecake stores beautifully. Just cover any leftover slices tightly with plastic wrap or pop the whole cheesecake (if it’s not already sliced) in an airtight container. It’ll keep in the fridge for up to 4 days. You can also freeze it! Wrap individual slices tightly in plastic wrap, then foil, and freeze for up to a month.
Reheating? Honestly, I don’t recommend it. This cheesecake is best served cold, straight from the fridge! But if you *must*, you can let it sit at room temperature for about 30 minutes before serving.
Nutritional Information (Disclaimer)
Okay, so, about the nutrition info: the numbers I’m giving you are just estimates, okay? They’re based on the ingredients I used, but things can vary depending on the brand of cream cheese, graham crackers, and all that jazz. So, take it with a grain of salt, you know? I’m not a nutritionist, so I can’t guarantee exact values. Just a heads up!
Print
Easy 1 Recipe for No Water Bath Cheesecake
- Total Time: 5 hours 15 minutes
- Yield: 10 servings
- Diet: Vegetarian
Description
Easy no-water-bath cheesecake recipe for beginners. Get creamy, delicious results without the hassle.
Ingredients
- 1 ½ cups graham cracker crumbs
- ⅓ cup granulated sugar
- 6 tablespoons unsalted butter, melted
- 32 ounces cream cheese, softened
- 1 ½ cups granulated sugar
- 1 teaspoon vanilla extract
- 4 large eggs
Instructions
- Preheat your oven to 350°F (175°C).
- Mix graham cracker crumbs, sugar, and melted butter. Press into a 9-inch springform pan.
- Beat cream cheese and sugar until smooth.
- Add vanilla.
- Add eggs one at a time, mixing until just combined.
- Pour filling over crust.
- Bake for 50-60 minutes, or until the edges are set and the center jiggles slightly.
- Let cool completely before refrigerating for at least 4 hours.
Notes
- Ensure cream cheese is softened.
- Don’t overbake to prevent cracking.
- Chill thoroughly before serving.
- Prep Time: 20 minutes
- Cook Time: 55 minutes
- Category: Dessert
- Method: Bake
- Cuisine: American
Nutrition
- Serving Size: 1 slice
- Calories: 450
- Sugar: 35g
- Sodium: 200mg
- Fat: 30g
- Saturated Fat: 18g
- Unsaturated Fat: 8g
- Trans Fat: 1g
- Carbohydrates: 38g
- Fiber: 1g
- Protein: 7g
- Cholesterol: 120mg


 9")


