Okay, let’s talk turkey! Forget those dry, unevenly cooked birds of Thanksgivings past. If you’re ready to seriously up your holiday game, you *have* to try spatchcocking your turkey. Trust me on this, it’s a total game-changer. I remember one year, my turkey was practically raw in some spots and burnt in others. Disaster! Then I discovered the spatchcock method, and it was like a culinary miracle. My turkey cooked evenly, the skin was shatteringly crisp all over, and carving was a breeze. This isn’t just a recipe; it’s the secret to a truly memorable, stress-free holiday feast that’s worth its weight in gold (or, you know, delicious gravy). You’ll be a turkey hero, I promise!
Why Choose a Spatchcock Turkey?
Okay, so why go through the little bit of extra effort to spatchcock your turkey? Honestly, it’s all about making your life easier and your turkey taste way, way better. When you flatten out that bird, you’re essentially saying goodbye to the dreaded undercooked breast and overcooked legs. It cooks way faster, which is a lifesaver on busy holidays. Plus, that even surface means you get gloriously crispy, golden-brown skin all over, not just in a few random spots. It just transforms the whole experience!
Faster Cooking Times for Your Spatchcock Turkey
Seriously, this is one of the biggest wins. By removing the backbone and flattening your turkey, you expose more of the meat directly to the oven’s heat. This means your turkey cooks so much more evenly and, you guessed it, a whole lot faster than a traditional, puffy whole bird. You’ll be saving precious oven time on a day when every minute counts!
Achieving Perfectly Crispy Skin on Your Spatchcock Turkey
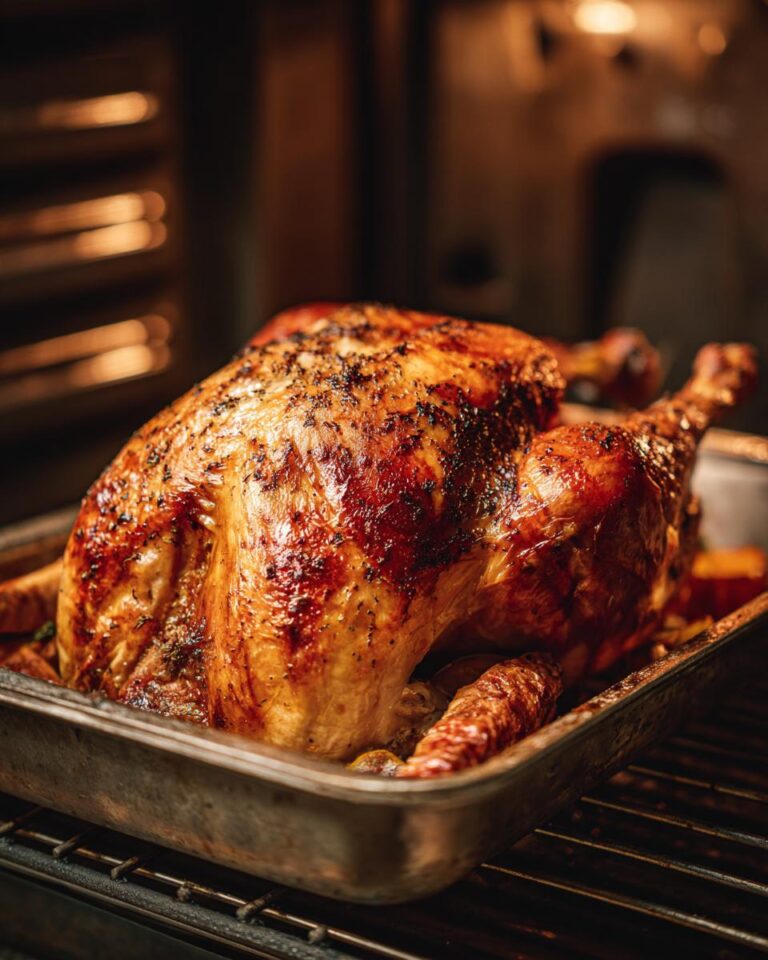
Oh, the skin! This is where spatchcocking really shines. Because the turkey is lying flat, the heat circulates around it so much better. This allows the skin to get beautifully crisp and golden all over – no more pale, flabby skin on the underside! It’s like magic for achieving that perfect crunch in every single bite.

Essential Ingredients for a Delicious Spatchcock Turkey
Alright, let’s gather our goodies for this amazing spatchcock turkey! You don’t need anything too fancy, just good quality ingredients to make this bird sing. Remember, the better the ingredients, the better the final result. We’re aiming for a juicy, flavorful turkey with that irresistible crispy skin. So, let’s get this organized!
The Turkey: Your Spatchcock Turkey Centerpiece
First things first, grab a good turkey! For this recipe, we’re looking for a whole turkey between 12 and 15 pounds. I always go for fresh, never frozen, if I can. It just seems to have a better texture, and honestly, thawing a huge frozen bird can be a whole production. Make sure it’s good quality – it’s the star of the show, after all!
Flavorful Herb Butter for Your Spatchcock Turkey
This is where all the magic happens for flavor and crispy skin! You’ll need about half a cup of unsalted butter, and it *has* to be softened. Leave it on the counter for an hour or so. You want it spreadable, not melted. Then, we’re going to mix in 2 tablespoons of chopped fresh rosemary and 1 tablespoon of fresh thyme. Don’t skimp on the fresh herbs; they make such a difference! Add in 1 tablespoon of garlic powder, 1 teaspoon of salt, and 1 teaspoon of black pepper. Mix it all up until it’s a lovely, fragrant paste.
Acidity and Aroma: Lemon for Your Spatchcock Turkey
For a little zing and brightness, we’ll use one lemon. You’ll just cut it in half. We’ll squeeze the juice from one half all over the turkey before it goes into the oven. The other half? Just pop that right into the cavity. It adds a subtle, lovely aroma as the turkey roasts, and that little bit of acidity helps cut through the richness.
How to Prepare Your Spatchcock Turkey Step-by-Step
Okay, deep breaths! This is the part that sounds a little intimidating, but I promise, it’s totally doable and so worth it. Grab your turkey and let’s get this done. It’s all about making this bird cook beautifully!
Spatchcocking the Turkey: Removing the Backbone
First up, we need to get that backbone out. Place your turkey breast-side down on a clean cutting board. You’ll see the backbone running right down the middle. Now, grab some sturdy kitchen shears – these are your best friends here – or a really sharp knife if you’re brave! You’re going to cut along one side of the backbone, all the way from the neck end to the tail end. Then, do the same on the other side. It might take a little effort, so don’t be afraid to put some muscle into it. Once it’s cut free, just lift it out. Voilà! You’ve spatchcocked your turkey!
Flattening Your Spatchcock Turkey
Now that the backbone is out, flip that bird over so the breast side is facing up. See that ridge right in the middle? That’s the breastbone. You need to flatten it out. Place the heel of your hand firmly on top of the breastbone. Give it a good, solid press down. You might hear a little crack or pop – that’s totally normal! It just means the joints are giving way. You want the turkey to lay as flat as possible. This is key for even cooking, remember?
Applying the Herb Butter to Your Spatchcock Turkey
Time for the flavor bomb! Take that softened herb butter you made earlier. Gently loosen the skin over the breast and thighs. You can do this with your fingers or the handle of a spoon. Carefully slide as much of that delicious butter mixture as you can under the skin. Get it everywhere you can reach! Then, take the rest of the butter and rub it all over the outside of the turkey – the skin, the legs, everything. Make sure it’s nicely coated. This is going to give you amazing flavor and help that skin get super crispy.
Roasting Your Spatchcock Turkey to Perfection
Preheat your oven to 425°F (220°C). Get a sturdy baking sheet and place a roasting rack inside it. Put your buttered, flattened turkey onto the rack. Now, take that squeezed lemon half and just tuck it into the cavity area, even though it’s flattened. You can also squeeze the juice from that lemon half all over the top of the turkey. Pop the whole thing into the preheated oven. Roast it for about 60 to 75 minutes. The best way to know it’s done is with a meat thermometer – you’re looking for 165°F (74°C) in the thickest part of the thigh.

Tips for the Best Spatchcock Turkey Ever
Want to make your spatchcock turkey absolutely legendary? It’s all about a few little tricks that make a huge difference. These simple steps will elevate your bird from just-cooked to downright spectacular!
Patting Your Spatchcock Turkey Dry for Crispier Skin
Okay, this is HUGE for that amazing crispy skin we talked about. Before you even think about rubbing on that delicious herb butter, take some paper towels and pat your turkey *really* dry. Get into all the nooks and crannies. The drier the skin, the crispier it’s going to get in the oven. Seriously, don’t skip this step – it’s a game-changer!
Roasting Vegetables with Your Spatchcock Turkey
Why dirty another pan? You can roast veggies right alongside your turkey! Toss some chopped carrots, onions, and potatoes with a little olive oil, salt, and pepper, and spread them out on the baking sheet *underneath* the roasting rack. They’ll soak up all those delicious turkey drippings as it cooks. Just make sure they’re cut into roughly uniform pieces so they cook evenly. So easy and so flavorful!
Serving and Storing Your Spatchcock Turkey
Alright, the hardest part is over – your beautiful spatchcock turkey is cooked to perfection! Now, you just need to let it rest. This is super important, trust me. It lets all those juices redistribute throughout the meat, so when you carve it, it’s incredibly moist and tender. We’re talking about a good 15-minute rest. After that, carve it up and enjoy! Any leftovers? Just pop them into an airtight container in the fridge. They’ll keep well for about 3-4 days.
Resting Your Spatchcock Turkey Before Carving
Seriously, don’t rush this part! Letting your turkey rest for at least 15 minutes after it comes out of the oven is crucial. It allows the juices, which have been pushed to the center during cooking, to redistribute back into the meat. If you cut into it too soon, all that delicious moisture will just run out onto the carving board, leaving you with a drier bird. Patience is key for that super juicy bite!
Storing Leftover Spatchcock Turkey
Got some delicious spatchcock turkey left over? Lucky you! Once it’s cooled down a bit, just transfer it to an airtight container. You can store it in the refrigerator for about 3 to 4 days. It’s perfect for sandwiches, salads, or just reheating for a quick meal later in the week. Just make sure it’s properly sealed to keep it fresh!
Frequently Asked Questions about Spatchcock Turkey
Got some burning questions about this amazing flat turkey? I’ve got you covered! Spatchcocking might seem a little different at first, but it makes holidays so much smoother.
How to Spatchcock a Turkey for Thanksgiving
For Thanksgiving, spatchcocking is an absolute lifesaver! It means you get a perfectly cooked, juicy turkey with super crispy skin, and it cooks way faster. This frees up your oven for all those other amazing side dishes. Just follow the steps above – removing the backbone and flattening the bird is the key. It’s the best way to ensure everyone gets a good slice of perfectly roasted turkey, no matter how big your family is!
Is a Spatchcocked Turkey Easier to Carve?
Oh, 100%! This is one of my favorite parts. Because the turkey is flat, all the meat is more accessible. You can easily see where to cut, and the legs and thighs are right there, ready to be separated. No more awkward wrestling with a whole, rounded bird! Carving becomes way faster and less messy, which is a win-win in my book.
Can I Brine a Turkey Before Spatchcocking?
Absolutely! Brining your turkey before you spatchcock it is a fantastic idea if you want extra moisture and flavor. Just make sure you pat it *really* dry after brining, as I mentioned in the tips. A dry surface is crucial for getting that skin super crispy. So go ahead, brine away, then spatchcock and roast your way to turkey perfection!
Nutritional Information for Your Spatchcock Turkey
Just a heads-up, the nutritional info for turkey can really vary depending on the size and how much butter and seasoning you use. But, for a typical serving of about 8 ounces of this delicious spatchcock turkey, you’re looking at roughly 350 calories. You’ll get a good dose of protein, around 45 grams, which is fantastic! There’s about 18 grams of fat, with 6 grams being saturated fat. Don’t worry, there are no carbs or fiber to speak of in plain roasted turkey. These are just estimates, of course, but it gives you a good idea of what you’re working with!
If you want more ideas, check CravyBites on Pinterest!
Print
Amazing Spatchcock Turkey: 1 Hour Roast
- Total Time: 100 minutes
- Yield: 8-10 servings
- Diet: None
Description
A spatchcock turkey is a whole turkey that has been butterflied by removing the backbone. This allows the turkey to lay flat, ensuring even cooking and crispy skin.
Ingredients
- 1 whole turkey (12-15 pounds)
- 1/2 cup unsalted butter, softened
- 2 tablespoons fresh rosemary, chopped
- 1 tablespoon fresh thyme, chopped
- 1 tablespoon garlic powder
- 1 teaspoon salt
- 1 teaspoon black pepper
- 1 lemon, halved
Instructions
- Preheat your oven to 425°F (220°C).
- Place the turkey on a clean work surface. Using kitchen shears or a sharp knife, cut along one side of the turkey’s backbone. Cut along the other side of the backbone and remove it completely.
- Flip the turkey over so the breast side is up. Press down firmly on the breastbone to flatten the turkey.
- In a small bowl, mix together the softened butter, rosemary, thyme, garlic powder, salt, and pepper.
- Rub the herb butter all over the turkey, getting under the skin of the breast and thighs.
- Place the flattened turkey on a roasting rack set inside a baking sheet.
- Squeeze the juice of one lemon half over the turkey. Place the squeezed lemon half inside the cavity.
- Roast for 60-75 minutes, or until a meat thermometer inserted into the thickest part of the thigh registers 165°F (74°C).
- Let the turkey rest for 15 minutes before carving.
Notes
- You can brine the turkey before spatchcocking for extra moisture and flavor.
- For crispier skin, pat the turkey very dry before applying the herb butter.
- Add vegetables like carrots, onions, and potatoes to the baking sheet to roast alongside the turkey.
- Prep Time: 25 minutes
- Cook Time: 75 minutes
- Category: Main Course
- Method: Roasting
- Cuisine: American
Nutrition
- Serving Size: 8 ounces
- Calories: 350
- Sugar: 0g
- Sodium: 200mg
- Fat: 18g
- Saturated Fat: 6g
- Unsaturated Fat: 12g
- Trans Fat: 0g
- Carbohydrates: 0g
- Fiber: 0g
- Protein: 45g
- Cholesterol: 150mg


 13")