Oh, these Pumpkin Pie Bars are just the best thing ever when fall rolls around! Seriously, they’re like a hug in dessert form. I remember making them for the first time for a Thanksgiving get-together, and everyone went absolutely bonkers for them. It’s just so much easier than fussing with a whole pie, you know? You get all that amazing, classic pumpkin pie flavor, all spiced up and creamy, but in this perfectly portioned bar that’s a breeze to serve. Trust me, if you love pumpkin pie, you’re going to adore these bars. They’re a staple in my kitchen from September through December!
Why You’ll Love These Pumpkin Pie Bars
Seriously, why wouldn’t you love these? They’re a total game-changer for fall baking!
- They’re ridiculously easy to make and even easier to serve – no fussy slicing needed!
- You get that dreamy, rich, classic pumpkin pie flavor that everyone raves about.
- They’re absolutely perfect for cozy Thanksgiving dinners and all your fall holiday get-togethers.
- Honestly, they’re just a guaranteed crowd-pleaser that makes everyone happy!
Essential Ingredients for Pumpkin Pie Bars
Okay, let’s talk about what goes into these magical pumpkin pie bars! It’s pretty straightforward, but a few little details make all the difference. First, for the crust, you’ll need about 1 ½ cups of all-purpose flour. Then, we’re going to bring in those warm fall spices: 1 teaspoon of ground cinnamon, ½ teaspoon of nutmeg, ¼ teaspoon of ginger, and another ¼ teaspoon of cloves. These guys are going to give our crust that yummy, slightly spiced base. For the wet ingredients in the crust, grab ½ cup (that’s one stick!) of unsalted butter that’s been softened – super important for creaming! You’ll also need ½ cup of granulated sugar, 1 large egg, and 1 teaspoon of vanilla extract. Just a heads-up, make sure that egg is nice and room temperature; it mixes in so much better!
Now, for that luscious pumpkin filling, which is where all the comforting flavor lives! You’ll need one 15-ounce can of pure pumpkin puree. Please, please, please make sure it’s just pumpkin puree and NOT pumpkin pie filling, which already has sugar and spices in it. We want to control all those flavors ourselves! Next, grab a 14-ounce can of sweetened condensed milk – this is what gives it that incredible creamy texture. Then, we’ll add 2 large eggs to help set everything up beautifully. For that classic pumpkin pie taste, we’ll use 1 teaspoon of pumpkin pie spice (or you can mix your own cinnamon, ginger, nutmeg, and cloves if you’re feeling extra fancy!) and ½ teaspoon of salt to balance out all the sweetness.

How to Prepare Pumpkin Pie Bars: Step-by-Step
Alright, let’s get these delicious pumpkin pie bars into the oven! It’s really not complicated at all. First things first, go ahead and preheat your oven to 350°F (that’s 175°C). While that’s warming up, grab your trusty 9×13 inch baking pan. Give it a good grease and then a light dusting of flour. This stops any sticking, which is a total lifesaver when you’re trying to get those perfect clean squares later!
Now, for the crust. You’ll want to get a medium bowl and whisk together your flour, cinnamon, nutmeg, ginger, and cloves. Just give them a good stir so everything is nicely combined. In a separate, larger bowl, cream together your softened butter and granulated sugar until it looks light and fluffy. Seriously, this creaming step is key! Then, beat in that large egg and the vanilla extract until it’s all smooth.
Next, it’s time to bring those dry ingredients into the wet. Gradually add the flour mixture to your butter and sugar mixture. Mix it all up until it’s *just* combined. Don’t go crazy overmixing here, or your crust might get a little tough. Once it’s mixed, press this dough evenly into the bottom of your prepared baking pan. You want a nice, even layer for your crust.
For the filling, grab another bowl. Whisk together your pumpkin puree, sweetened condensed milk, the 2 large eggs, pumpkin pie spice, and salt. Whisk it all until it’s super smooth and creamy. You don’t want any streaks of egg or lumps of pumpkin.
Now for the assembly! Carefully pour that gorgeous pumpkin filling evenly over the crust you just pressed into the pan. Try to get it as smooth as possible. Once that’s done, it’s time to bake! Pop the pan into your preheated oven and bake for about 35 to 45 minutes. You’ll know they’re ready when the center looks set and a toothpick you poke in near the center comes out clean. If it comes out with wet batter, give it a few more minutes.
The hardest part? Waiting for them to cool completely! Seriously, let them cool all the way down on a wire rack before you even think about cutting them into bars. If you try to cut them while they’re warm, they’ll just crumble apart. Patience, my friend, patience!


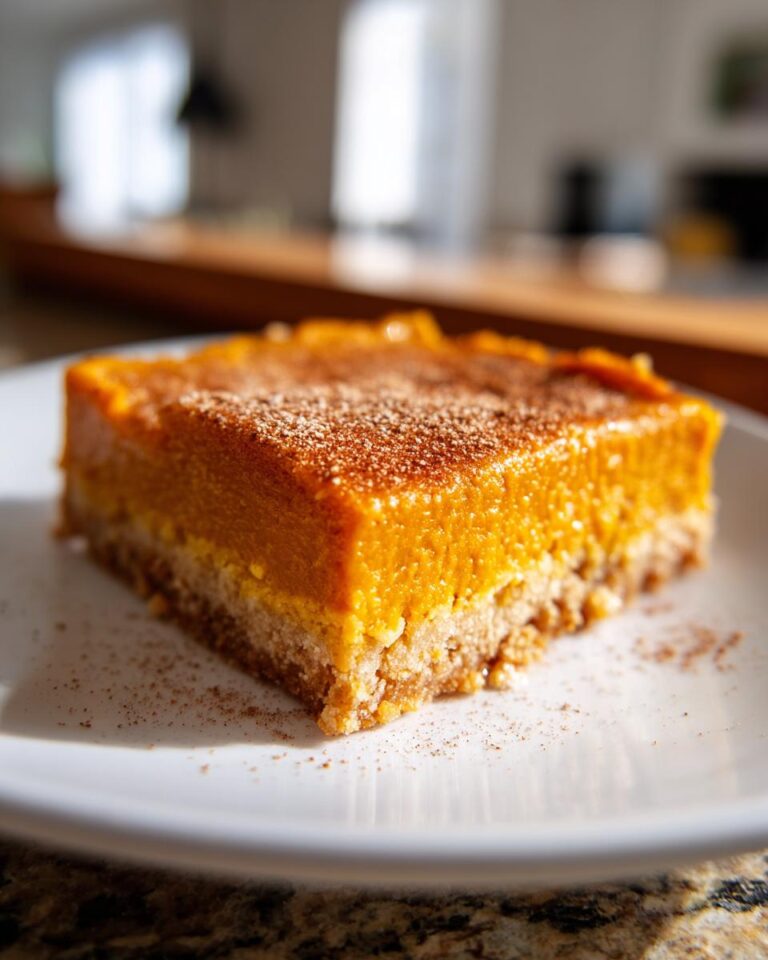
Amazing Pumpkin Pie Bars: A Taste of Fall
- Total Time: 1 hour
- Yield: 24 bars
- Diet: Vegetarian
Description
Enjoy the classic taste of pumpkin pie in an easy-to-serve bar format. Perfect for holidays and fall gatherings.
Ingredients
- 1 ½ cups all-purpose flour
- 1 teaspoon ground cinnamon
- ½ teaspoon ground nutmeg
- ¼ teaspoon ground ginger
- ¼ teaspoon ground cloves
- ½ cup (1 stick) unsalted butter, softened
- ½ cup granulated sugar
- 1 large egg
- 1 teaspoon vanilla extract
- 1 (15 ounce) can pumpkin puree
- 1 (14 ounce) can sweetened condensed milk
- 2 large eggs
- 1 teaspoon pumpkin pie spice
- ½ teaspoon salt
Instructions
- Preheat oven to 350°F (175°C). Grease and flour a 9×13 inch baking pan.
- In a medium bowl, whisk together flour, cinnamon, nutmeg, ginger, and cloves.
- In a large bowl, cream together softened butter and granulated sugar until light and fluffy. Beat in egg and vanilla extract.
- Gradually add the dry ingredients to the wet ingredients, mixing until just combined.
- Press the dough evenly into the prepared baking pan to form the crust.
- In a separate bowl, whisk together pumpkin puree, sweetened condensed milk, eggs, pumpkin pie spice, and salt until smooth.
- Pour the pumpkin mixture evenly over the crust.
- Bake for 35-45 minutes, or until the center is set and a toothpick inserted near the center comes out clean.
- Let cool completely on a wire rack before cutting into bars.
Notes
- For a richer flavor, you can add a tablespoon of bourbon to the pumpkin filling.
- Ensure your pumpkin puree is not pumpkin pie filling, which already contains sugar and spices.
- Bars can be stored in an airtight container at room temperature for up to 3 days, or refrigerated for up to a week.
- Prep Time: 20 minutes
- Cook Time: 40 minutes
- Category: Dessert
- Method: Baking
- Cuisine: American
Nutrition
- Serving Size: 1 bar
- Calories: 250
- Sugar: 25g
- Sodium: 90mg
- Fat: 12g
- Saturated Fat: 7g
- Unsaturated Fat: 5g
- Trans Fat: 0g
- Carbohydrates: 30g
- Fiber: 1g
- Protein: 4g
- Cholesterol: 50mg
Tips for the Best Pumpkin Pie Bars
Want to make sure your pumpkin pie bars are absolutely perfect every single time? It’s all about a few little tricks! Make sure those ingredients for the crust, like the butter and egg, are at room temperature. It really helps them combine smoothly without overworking the dough. Speaking of dough, try not to overmix it! Just mix until it’s combined, and you’ll have a tender crust. Remember that crucial tip about using pure pumpkin puree and *not* pumpkin pie filling? That’s a non-negotiable for the best flavor! And the biggest tip for those clean, beautiful slices? Let them cool completely! Seriously, resist the urge. A fully cooled bar cuts so much cleaner and tastes even better.
Ingredient Notes and Substitutions for Pumpkin Pie Bars
Let’s chat about a couple of ingredients that are super important for these pumpkin pie bars! First off, that pumpkin puree is key. You absolutely want to grab a can of 100% pure pumpkin puree – not the pumpkin pie filling, because that stuff already has sugar and spices mixed in, and we want to control that ourselves! For the crust, unsalted butter is usually best because it lets you control the saltiness yourself, but salted butter works in a pinch; just maybe cut back a tiny bit on the added salt if you do. Feel free to play around with the spices too – if you like things extra cinnamon-y, go for it! And for a little grown-up kick, a tablespoon of bourbon stirred into the filling is just divine!
Serving and Storing Your Pumpkin Pie Bars
These pumpkin pie bars are just begging to be served! They’re fantastic on their own, but seriously, a dollop of fluffy whipped cream or a light dusting of powdered sugar takes them over the top. They are just perfect for any fall gathering or holiday table. When it comes to storing any leftovers (if there are any!), you can keep them right on the counter in an airtight container for about 3 days. If you want them to last a bit longer, pop them in the fridge, and they’ll be good for up to a week. Easy peasy!

FAQs
Got questions about these amazing pumpkin pie bars? I’ve got answers! Many folks ask if they can whip these up ahead of time. Yep, absolutely! They’re even better the next day, so they’re a fantastic make-ahead Thanksgiving dessert. For the cleanest cuts, chill the bars in the fridge for at least an hour before slicing. Use a sharp knife and wipe it clean between cuts – it makes a world of difference for those perfect pumpkin squares! Some people wonder about changing the crust. While this shortbread-style crust is divine, you could technically use a graham cracker crust if you’re in a pinch, but this one really complements the pumpkin filling beautifully. And how do you know when these pumpkin bars are done baking? Keep an eye out for the edges to be set and lightly golden, and a toothpick inserted near the center should come out with just a few moist crumbs, not wet batter. That’s your sign they’re ready for cooling!
Nutritional Information
Just a little heads-up, the nutritional info for these pumpkin pie bars is an estimate. It can totally change depending on the brands you use and even how perfectly you measure everything. So, think of these numbers as a general guide – the real star is the deliciousness, right?
For more delicious recipes and inspiration, check out our Pinterest page!


 15")